Recipes from this last class are below, along with some great photos taken by photographer-extraordinare (and student) Ashley Conlon. You can see more of her photos here.
Squash, Sage, and Ricotta Cannelloni

Adapted from Everyday Food
Prep Time: 35 minutes
Total Time: 1 ¼ hour
Serves 4, but doubles easily.
Ingredients:
3 Tbsp olive oil, plus more for baking dish and sheet
Coarse salt and ground pepper
2 packages of manicotti
½ butternut squash (about 1 pound), peeled, seeded, and cut into 1-inch chunks
2 shallots, chopped
¼ cup plus 2 Tbsp milk
1 tsp finely chopped fresh sage leaves, plus 8 to 10 whole leaves
1/8 tsp ground nutmeg
2 cups ricotta (15 ounces)
¾ cup grated Parmesan
Directions:

Preheat oven to 350. Lightly oil a 2-quart or 8-inch square baking dish. In a large pot of boiling salted water, cook pasta until al dente. Using tongs, transfer pasta to a lightly oiled rimmed baking sheet.
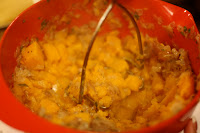
Add squash to boiling water and cook until tender, about 10 minutes. Drain squash and transfer to a bowl.


Stuff manicotti with squash mixture and place in baking dish. In a bowl, combine ricotta, ½ cup Parmesan, and ¼ cup milk and season with salt and pepper. Spread ricotta mixture over cannelloni and top with ¼ cup Parmesan. Bake until warmed through, about 25 minutes. Broil until top is browned, 2-3 minutes.
Meanwhile, in a small skillet, heat 2 tablespoons oil over medium-high. Fry whole sage leaves until crispy, 15-20 seconds. Drain on paper towels. Serve cannelloni topped with fried sage.

The original recipe called for wide lasagna noodles (the ones without the ridges on the edges), but I always have trouble finding these, and find that manicotti works well (you're rolling the lasagna noodles into tubes anyway - why not use something tubular to start with?). If you want to try lasagna noodles, you'd just place about 1/4 cup of the mixture into the middle of the noodle and then roll up and place into the baking dish seam side down. A friend (and advanced student) suggested that jumbo shells might also work.
Adapted from a class I took by the baker at Gourmandise Desserts
Serves 4-6
Ingredients:
3 lbs Granny Smith or Pippin apples
2 Tbsp water
1/3 cup sugar
2 Tbsp butter
One sheet puff pastry
Preheat oven to 375.
Rinse the apples and slice into 8-10 pieces each, keeping the skins on. Sprinkle with lemon juice, if desired.

Place the sugar and water into a heavy metal 10x4 round cake pan and place it on the stove, with the heat on low. You are making a caramel, so you MUST NOT STIR while the sugar and water come together (otherwise, the sugar will begin to form into large clumps, and it will turn into a big lump of hot sugar). You’ll see the sugar start to melt and turn gold, which is what you want. If any sugar crystals attach themselves to the sides of the pan, wipe it down with a wet pastry brush.
Bring the mixture to a golden caramel color. All of the sugar should be integrated
 at this point. Add the butter and stir. Remove from the heat.
Arrange the apples over the caramel in a tight spiral. Return the cake pan to the stove and continue cooking over low heat, until a darker caramel color appears and the apples soften (about 5 minutes).
Take the puff pastry and cut out an 11-inch circle (you can use the
 cake pan to do this before you put it over the heat). Place over the apples, tucking the dough in on the sides.
Bake for 30 minutes until the dough is golden. Turn the tart over onto a plate, and enjoy. This is definitely best served directly out of the oven, so don’t wait too long!

Variations:
1. You can swap out the apples for any hearty fruit. Try pears, stone fruit (peaches, plums, etc), or even persimmons.
2. Try adding black pepper to the apples when you’re cooking them in the caramel. It adds a little unexpected punch.
